

A new episode that tries to depict the usual process of setting the background in an interior design project with Corona for 3ds Max.
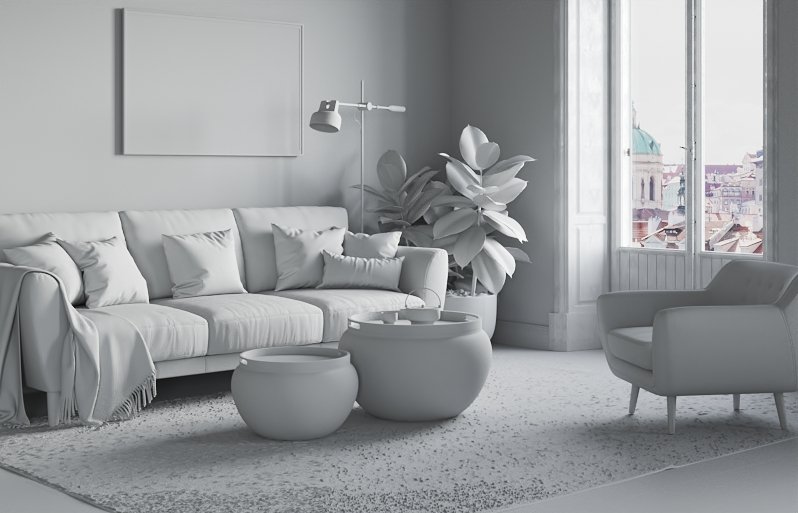
Table of Contents
Point 1: Setting the Background Image (Panel)
Today we need to set the background for our studio… we have different cameras and we are still configuring the light with the help of the Greymat technique.
The first thing we need to do is to look for a good Background Image. There are different places out there and we tend to visit the below ones, but there are many other free image pages with beautiful choices that would make the deal.
pexels.com
313stuff.com
unsplash.com
The image we select would need to have some basic requirements:
a) The image should follow the light logic of the composition. Overcast light > Overcast Picture…
b) The image should describe a horizontal line and should be taken parallel from the ground avoiding low/ high camera angles.
c) The image should be in High Definition and not clearly altered.
d) The image should match the lighting intentions, for instance, a very close building in the Background with a clear and well
illuminated room will not make much sense.
Insert a panel in your scene and select RMB click > Object Properties…
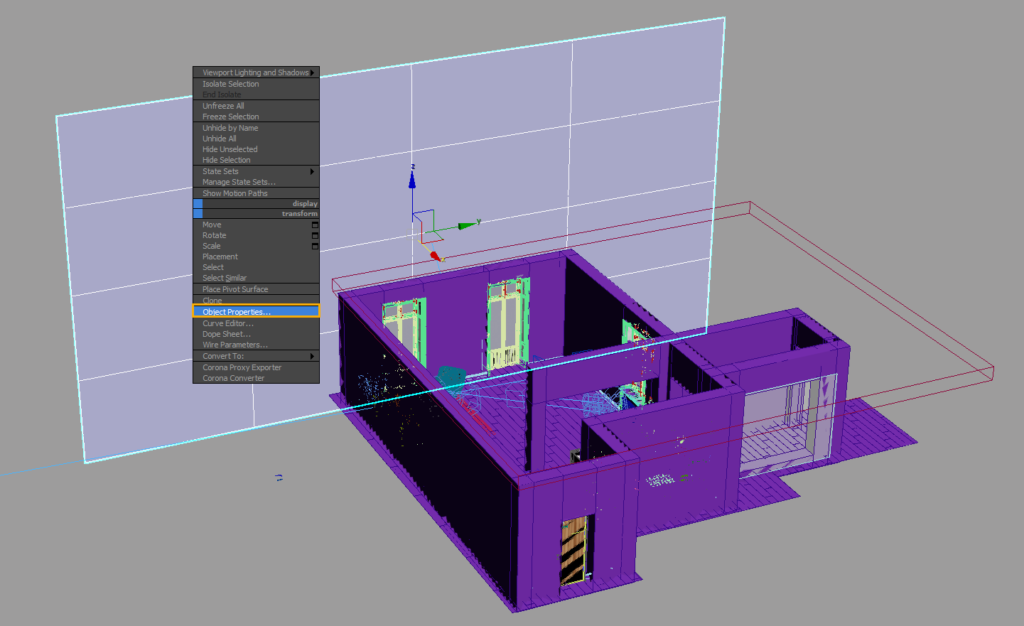
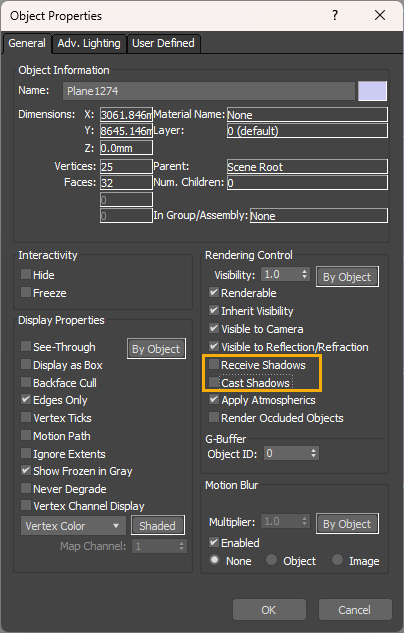
Uncheck the options Receive Shadows and Cast Shadows as the plane should not interfere with the light.
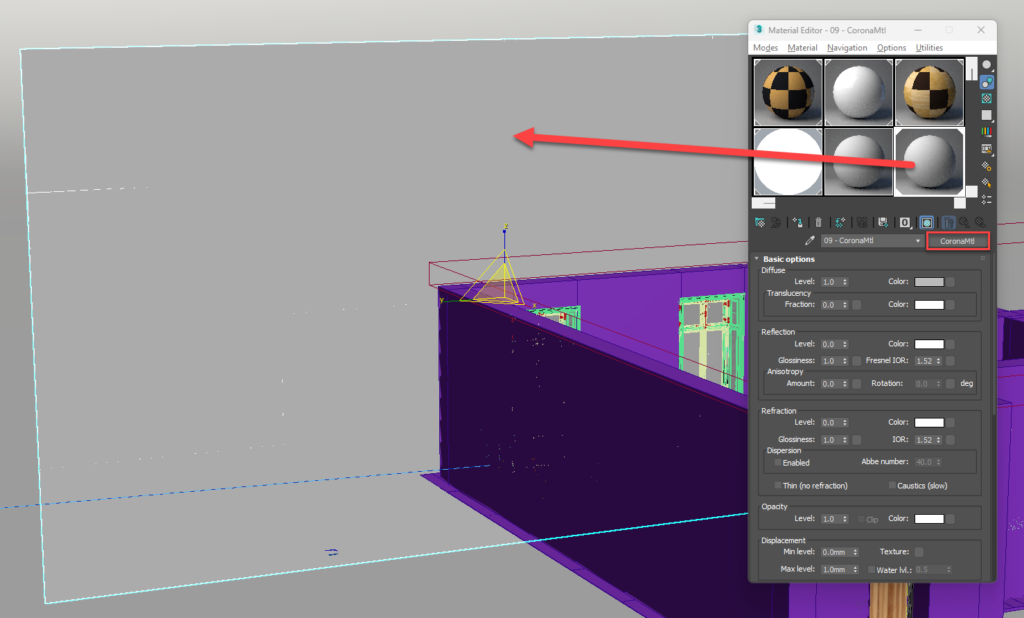
Time to assign a new material to the plane. Open the Material Editor and drag one of the default materials into the plane. We go to the CoronaMtl as we are going to use a Corona material.
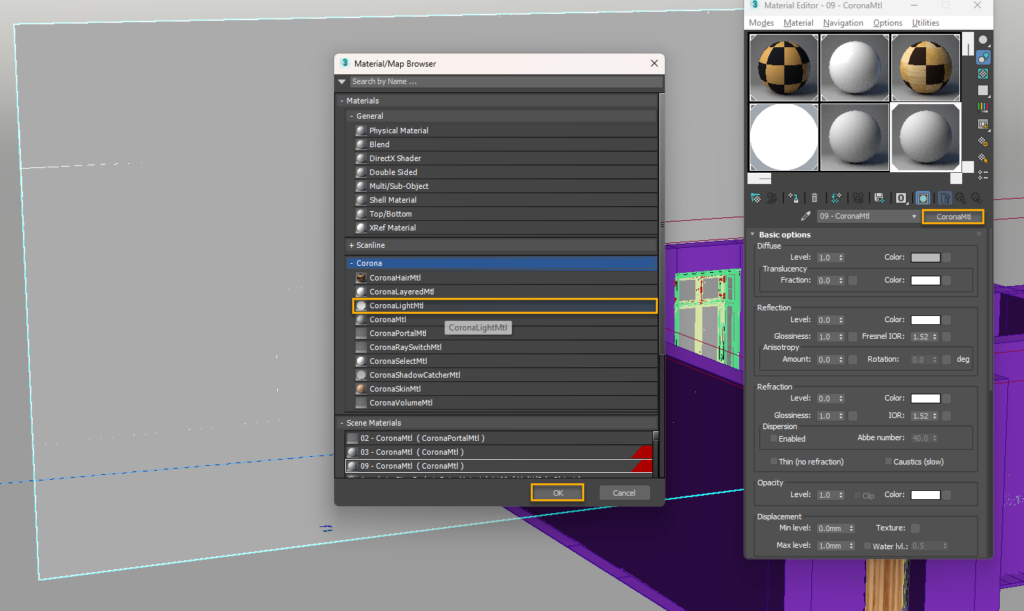
Select within the Corona list the CoronaLightMtl material.
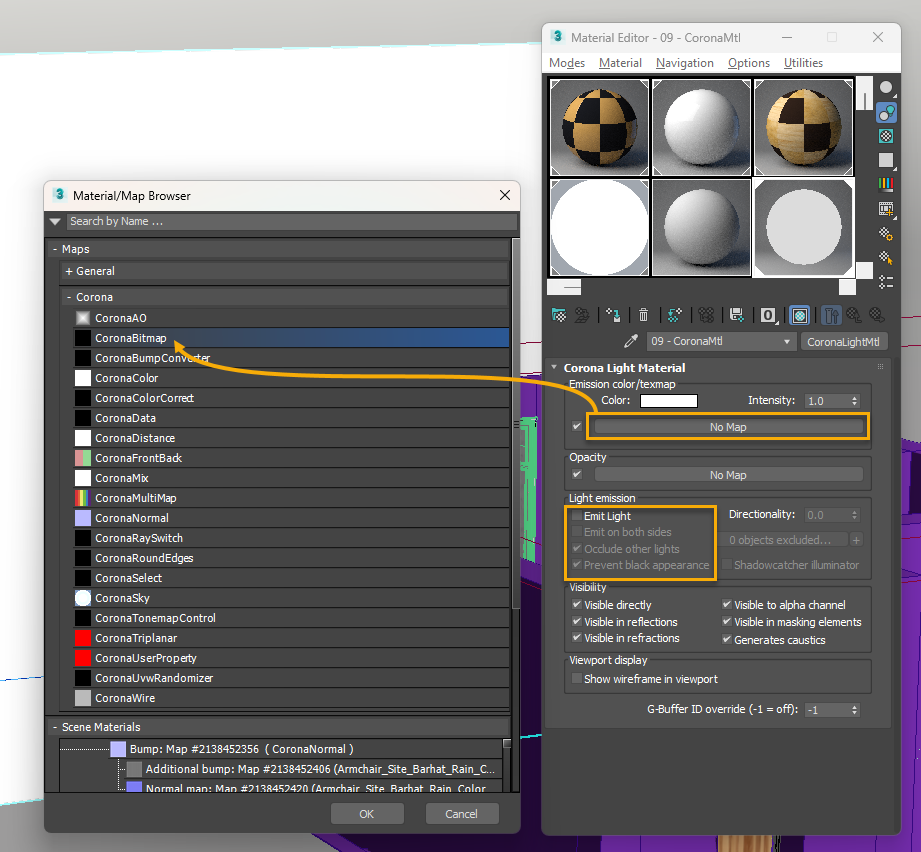
Within Light emissions, we uncheck the Emit Light option as it will not be a light source.
Now we bring our background in the textmap section by pressing No Map and selecting CoronaBitmap. A new panel will pop up asking you to select your background picture.
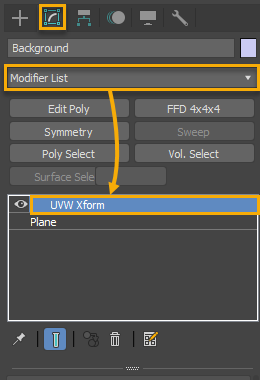
We apply the UVW Xform Modifier over our plane.
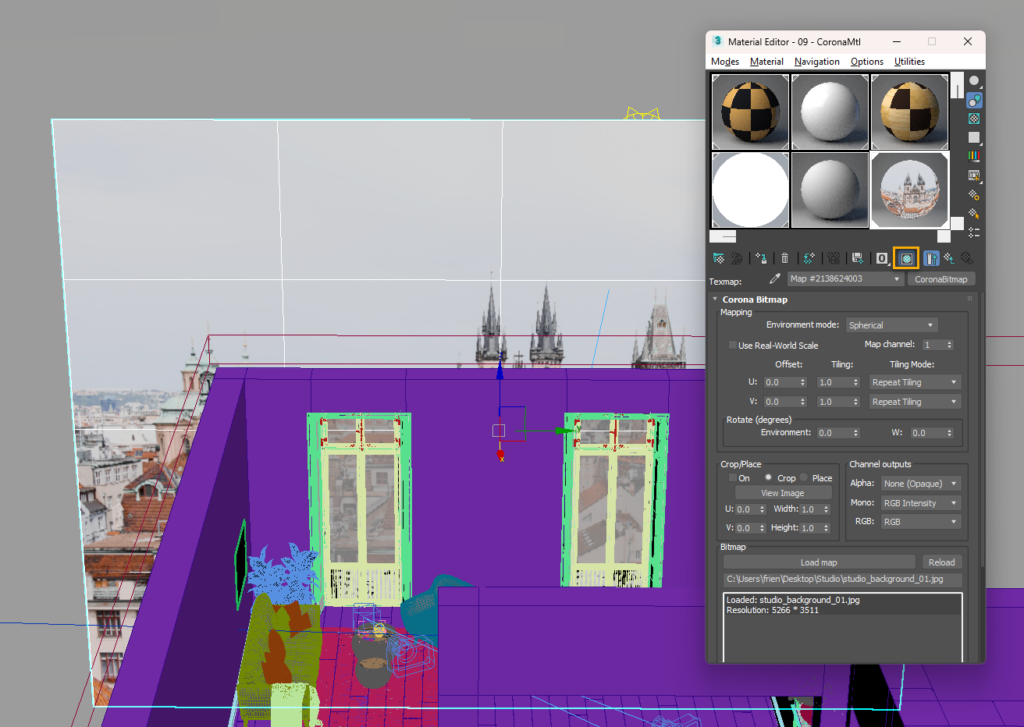
In case the picture does not appear on the plane remember to toggle the “Show Shaded Material…” from the Material Editor.
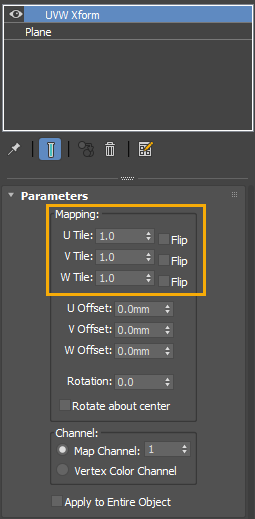
Ensure the picture is not appearing compressed or stretched by increasing or decreasing the U/ V/ W Tile Parameters within the UVW Xform modifier.
Remember to exclude the plane from your Greymat.
Point 2: Setting the Horizon
The horizon is relative to the eyes of the observer. The camera height is the one we need to identify by vanishing the lines of the floor and ceiling of the photograph till find the intersection point.
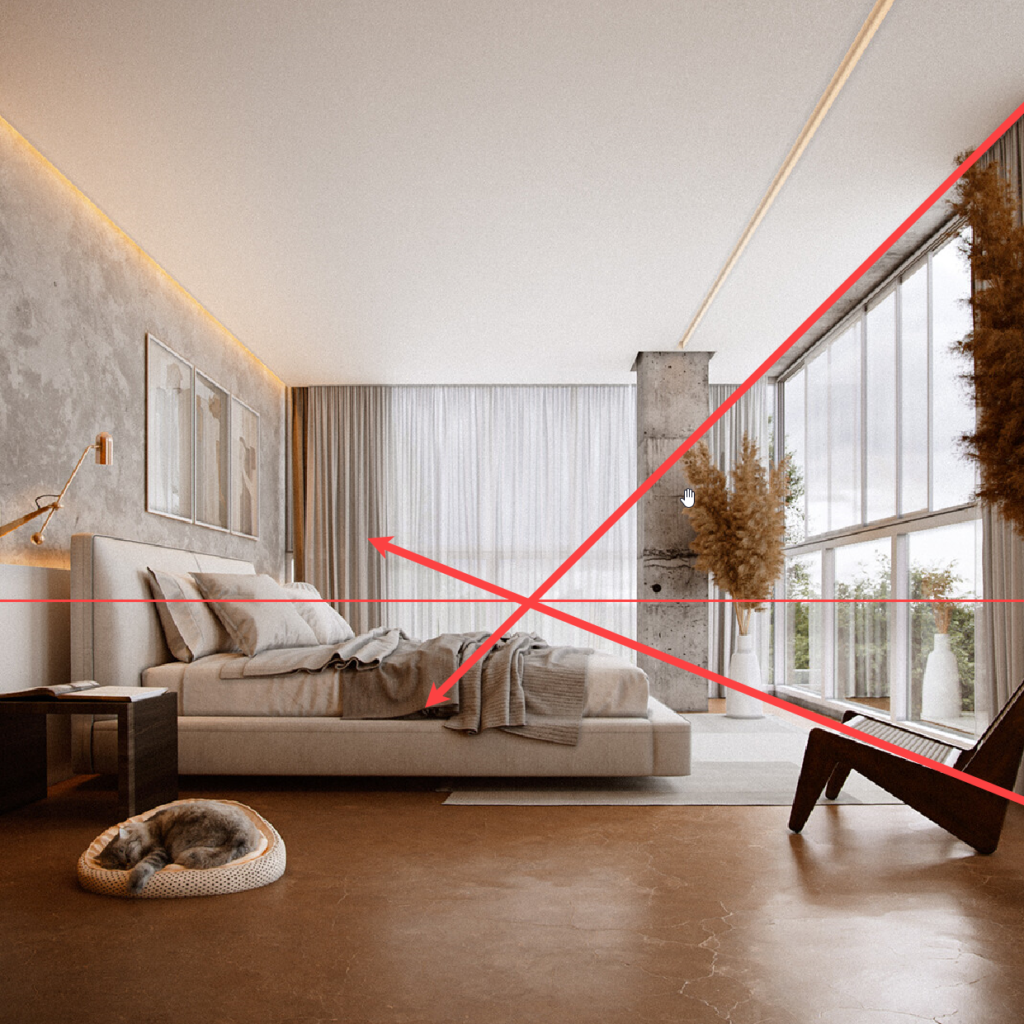
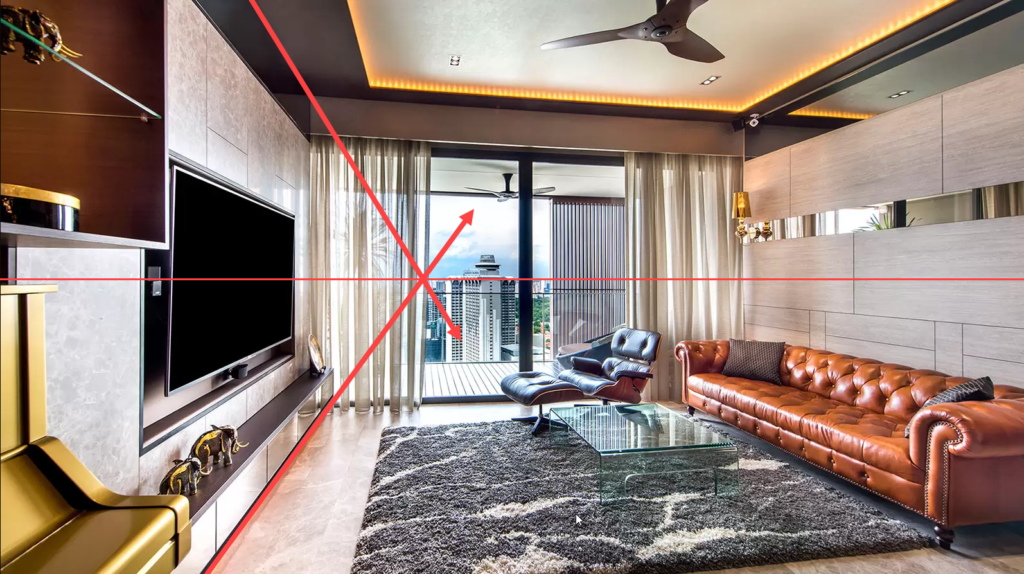
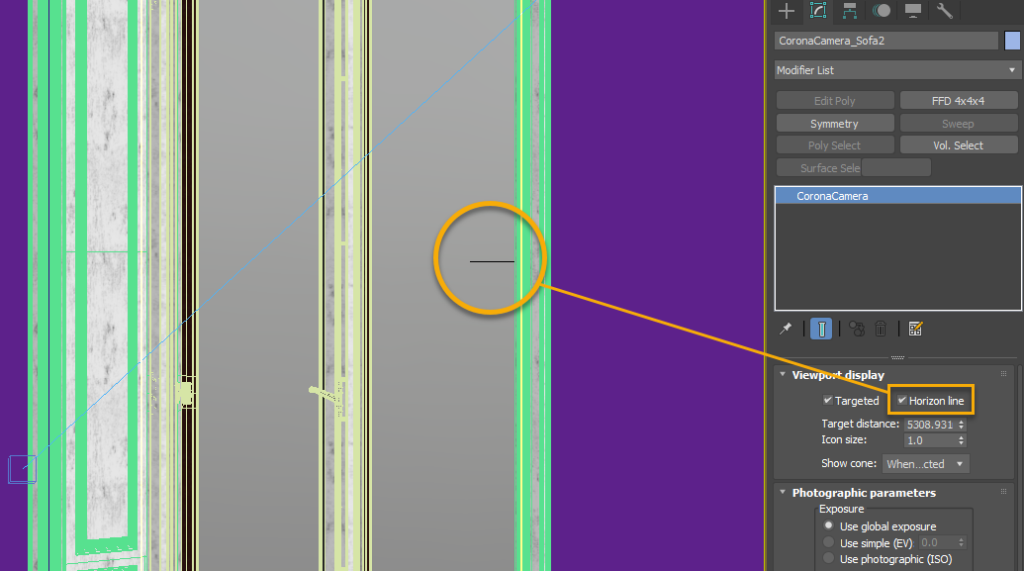
Corona provides great help by giving the option to set the camera’s horizon within the Modify options of the CoronaCamera. You can hide the background panel to see it better.
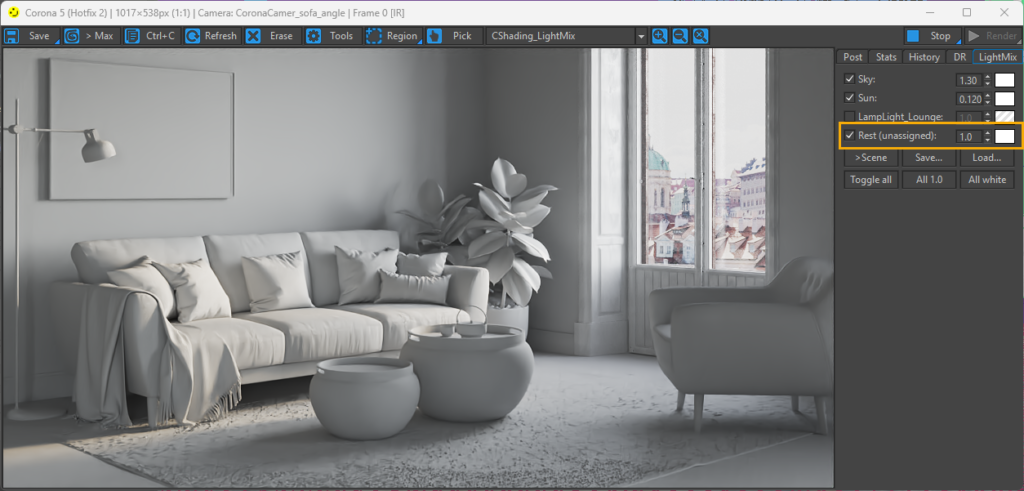
Remember to play with the panel’s light through the Rest (unassigned) light within the LightMix.
Point 3: Reviewing the windows assets
We can face some lighting issues in the scene that could make us spend some time scratching our heads looking for the issue source…and the material configuration from the windows crystals might be one of them.
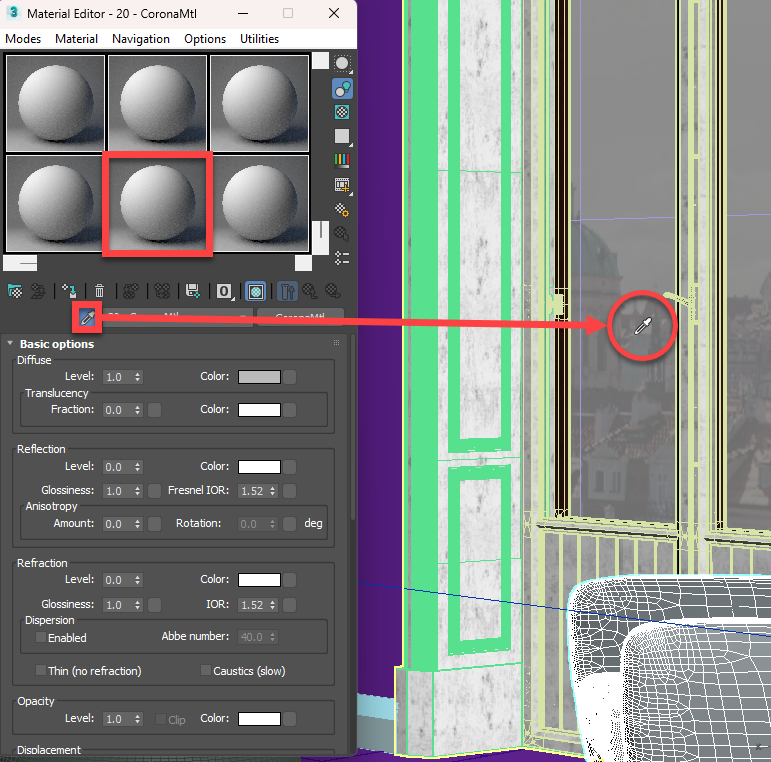
In order to get this info we need to go to our Material Editor, select one of the Default Material balls and use the “Picker” to get the material details from the window.
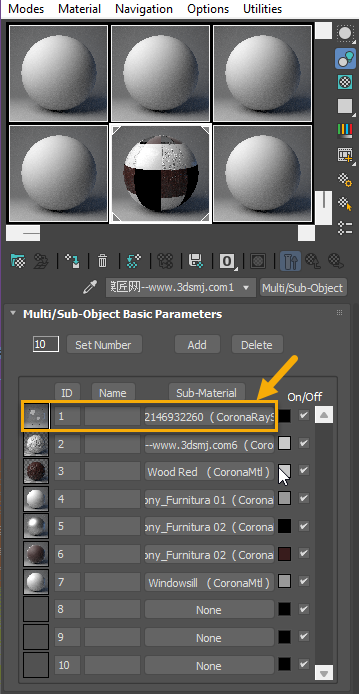
The Material Editor will bring the composition of the window asset where we need to identify the crystal material as above. Click in the Submaterial section to explode the material features.
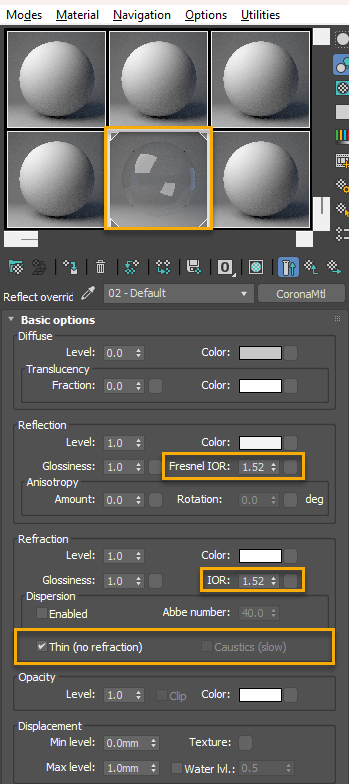
The glass of our window is thin, therefore will not have refraction and will not create caustics. Remember to always check this option to get better light input and better render times.
Fresnel IOR (Reflection) and IOR (Refraction) will have the same value that could vary from 1.51 to 1.62 for glass. You can see a complete list of IOR for materials in this link from CGSOCIETY: CGTalk | A complete IOR list (cgsociety.org)
IOR (Index of Refraction) is the value used to mimic in the 3D renderers the material properties in front of the light (light reflection & refraction).
The IOR for Reflection and Refraction are inherently connected, therefore they will keep the same values.
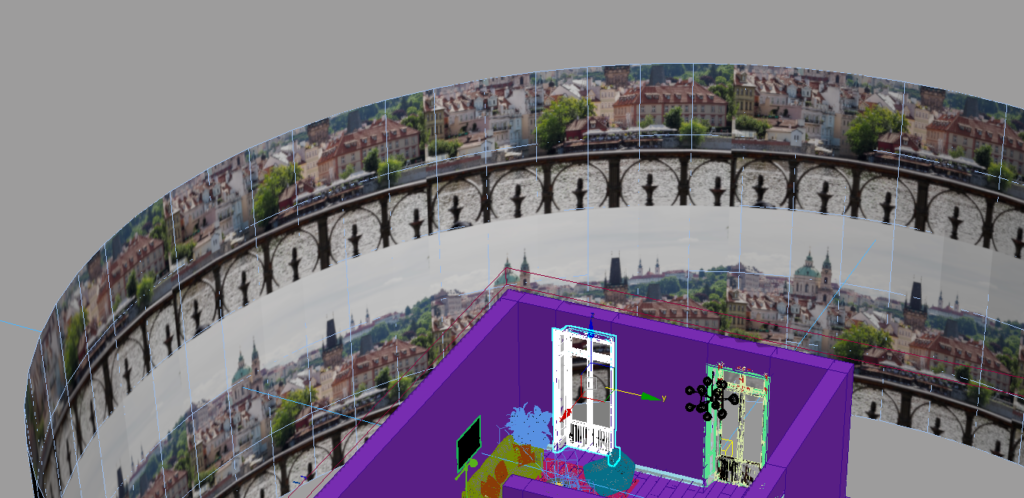
Point 4: Setting the Background Image (Cylinder)
For those cases where we need to play with many cameras and we do not want to bother about the background we could use a plane that surrounds the scene. This can be a full or half cylinder.
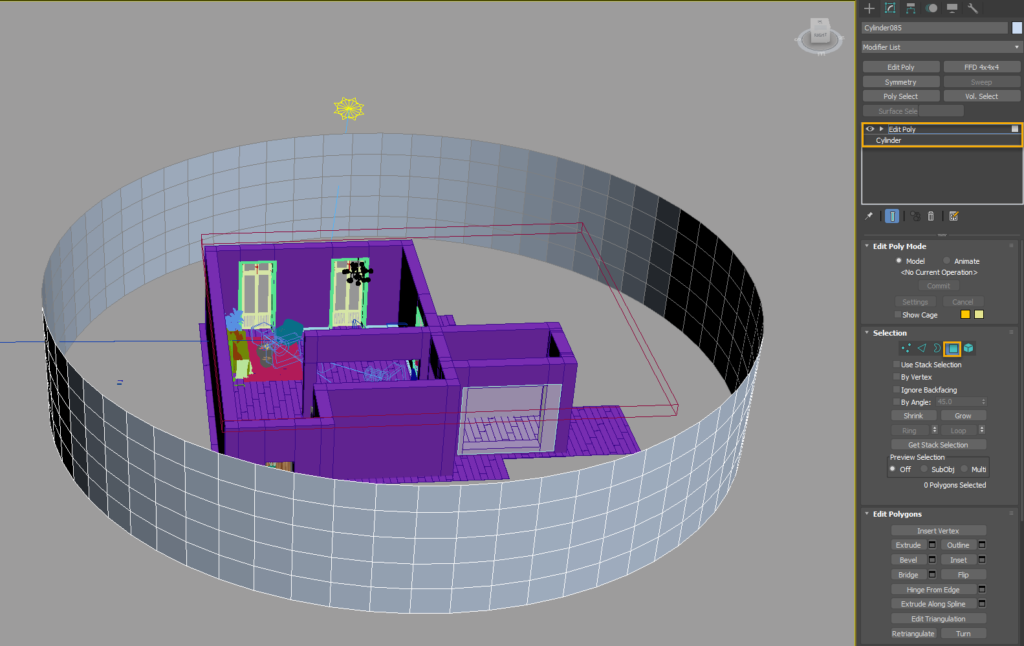
- Insert a cylinder that surrounds your scene and ensure to increase its number of sides to get it smooth (around 60).
- Apply Edit Poly and remove the top and bottom covers.
- Flip the normals of the cylinder to face them inside. Ctrl + A to select all the cylinder and click Flip on Edit Polygons section.
- Apply UVW Xform and drag the material that had the background over our cylinder.
- Play with the Mapping Parameters to adapt the image to make it realistic.
- Exclude the cylinder from the Greymat.


Miguel Angel Torio
HandyTales Founder & CEO


Bet88vietnam, alright! Been checking them out. Seems like a decent place to throw down some bets. Gotta say, interface ain’t bad. Might give it a go. Check them out yourself: bet88vietnam
Okay, so sv388onlineborneo303… long name, I know. But is it any good? Anyone playing there regularly? Lay it on me! Check out the site: sv388onlineborneo303
Yo, 662bet1, what’s the deal? Looking for a new spot to place my bets. Hope your site is smooth and the pay-outs are quick. Fingers crossed! 662bet1
Direct access to v9bet? V9betcom claims to have it. Gonna dive in and see if it’s legit. v9betcom
BK8BK8XO? That’s a mouthful! But the site is pretty decent. Worth exploring, for sure. Check it: bk8bk8xo
AE88AEL1 is the place to be! Got my game on. I’m super excited with this website: ae88ael1
Alright, looking into Linkred88. Easy access? Yes! Good options? Double Yes! Go have some fun: linkred88