

Vamos a generar una nueva topologia para nuestro modelo, que obviamente ya tiene una pero que es super densa puesto que asi se requeria para poder modelarla comodamente en Zbrush obteniendo acabados suaves y precisos de lo que viene a ser un modelo de anatomina femenina de corte realista.
El proposito que buscamos es acabar haciendo un Rig del modelo en Maya y poder asi tener una herramienta con la que poder jugar con diferentes poses antes de mover a Zbrush nuestro futuro personaje para asi continuar con el posterior modelado.
Si queremos mover el modelo tal como esta en Zbrush a Maya…se puede, pero trabajar en Maya con topologias tan densas no es lo mas adecuado y menos si queremos tener cierta agilidad a la hora de poder manipular el modelo con nuestro Rig.
Actualmente la modelo tiene un total de 38.029.000 puntos activos que vendrian a ser, puesto que creo son todos quads, 38.0028.998 polys, por tanto una barbaridad para trabajar comodamente en Maya. Esto mismo nos pasa cuando queremos preparar el modelo para que funcione en juegos o animacion donde se requieren de topologias muy ligeras.
Tip: Recuerda que Zbrush no menciona literalmente el Polycount sino puntos activos que vendrian a ser los vertices de los poligonos, si quieres saber el numero de de polys solo haria falta restar dos puntos activos del total si trabajamos con quads. Piensa en un cubo o dado…Cuantos poligonos tiene?… 6, perfecto…y vertices?…8, por tanto Zbrush nos daria 8 puntos activos, pero serian 6 polys.
En videojuegos el renderizado es en tiempo real, asi pues el hardware, la consola, el PC, o el servidor, estara maniatado solo pudiendo aceptar un numero reducido de polygonos para que el juego se mueva con fluidez. Este condicinante se ve afectado por las constates mejoras del Hardware, pero aun asi es todabia necesario optimizar la topologia y mover en la medida de lo posible, los detalles del modelo a los mapas de normales.
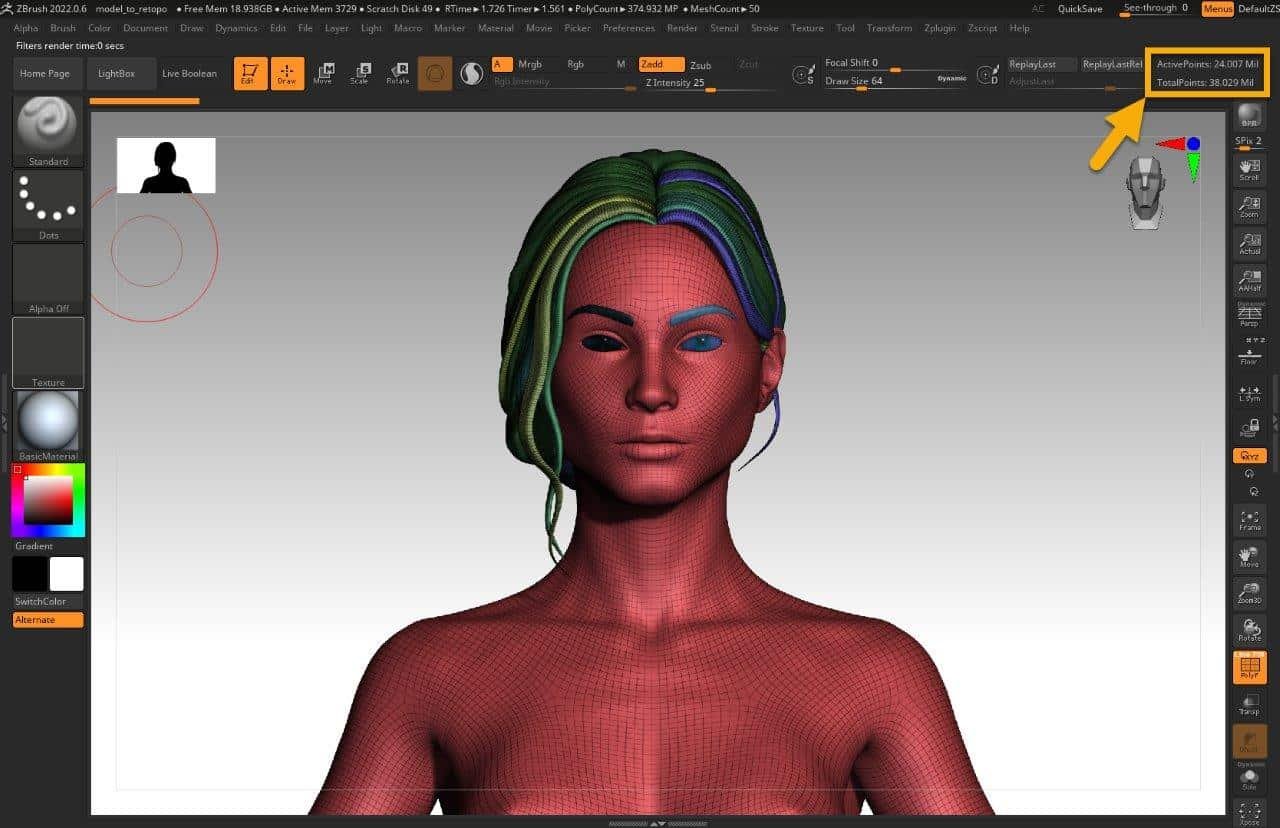
Table of Contents
Point 1: Exportamos el modelo decimado a Maya

Vamos a exportar el modelo a Maya, pero dado que solo lo queremos como referencia para luego ir pegandole la nueva topologia, reduciremos la maya al maximo sin perder el detalle de la escultura.
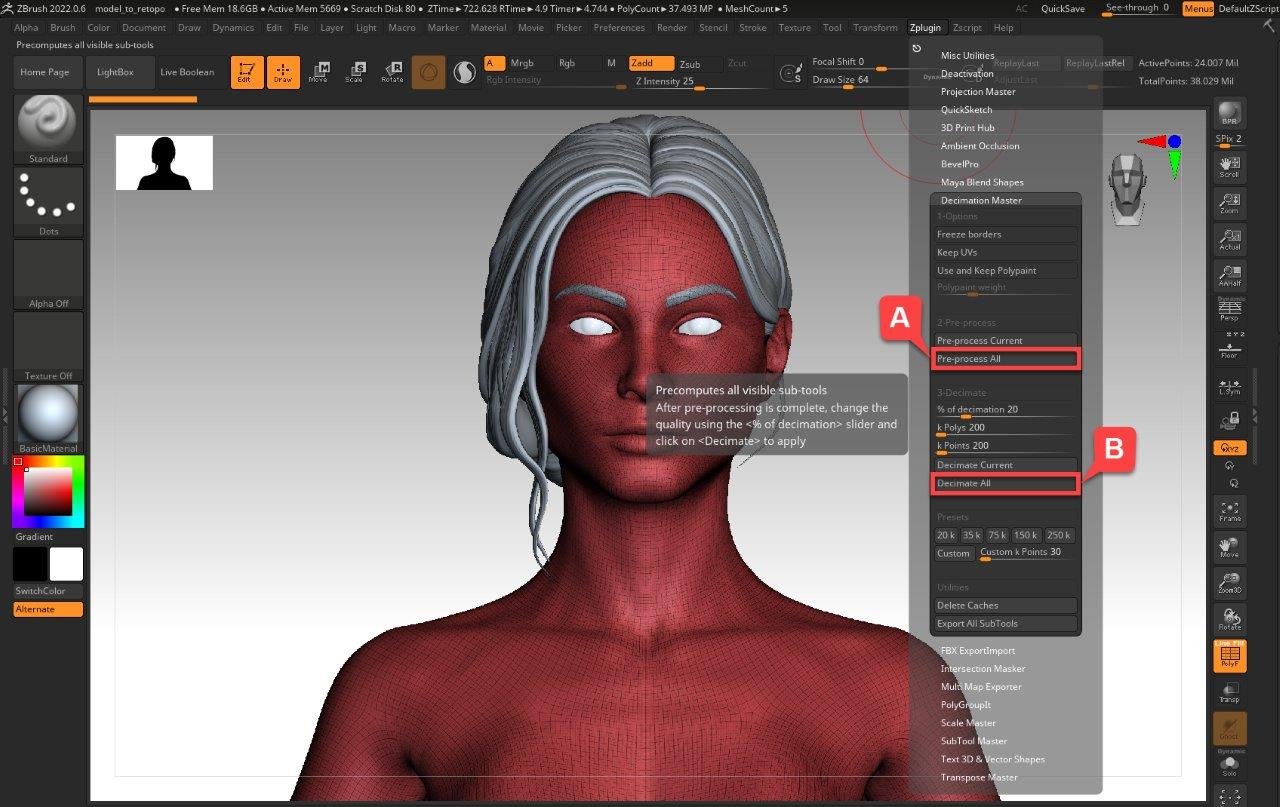
Dado que no nos importa la calidad de la maya, aplicaremos la herramienta de Zbrush de reduccion de polys: Zplugin> Decimation Master.
Dentro de esta tool le daremos a la opcion de Pre-Process All (A)que analizara la malla de todas las tools del proyecto y preparara lo que necesite Z para luego aplicar los cambios cuando seleccionemos la opcion Decimate All (B).
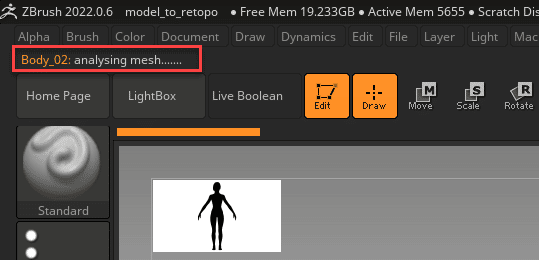
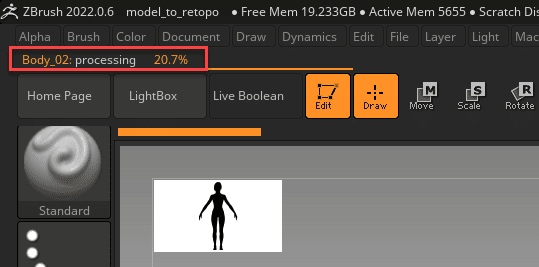
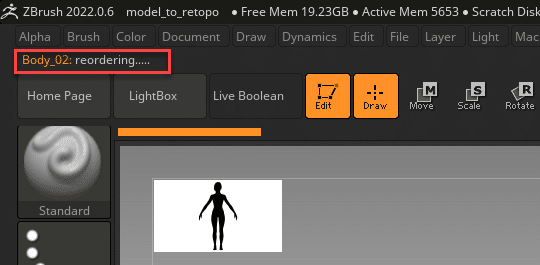
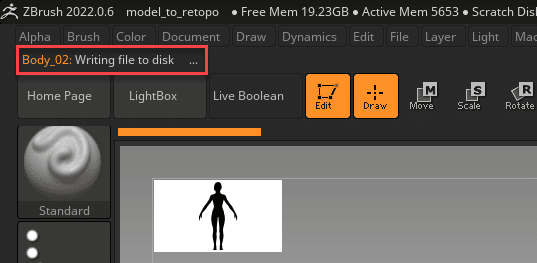
Cuando apretemos a Pre-Process Current veras como recorre todas las subtool mostrando unos mensages tal como los que te mostramos a continuacion, y que podras ver en la parte superior izquierda de la pantalla de Z.
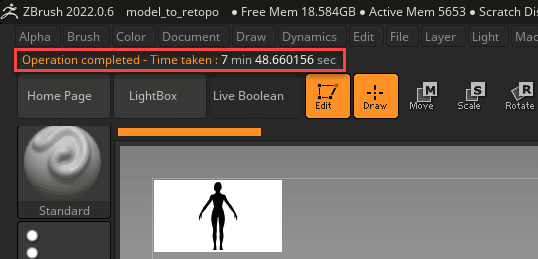
Este proceso puede tardar unos cuantos minutos (me tardo 7 minutos el proceso completo). Todo depende de vuestro modelo y de vuestro PC.
Recuerda que cuando el proceso finalice, tu modelo no habra sufrido ninguna modificacion.
Ya le hemos dado a Decimate All y ahora tenemos todas las mayas con una reduccion del 80%…vemos que nos respeta el detalle y podemos ir tool a tool reduciendo un poco mas siendo mas generoso en aquellas mayas mas sencillas.
Recueda que si quieres decimar otra vez solo tienes que seleccionar la tool que quieres reducir y entonces debes marcar un porcentaje de reduccion inferior al actual (20%), ya que el porcentaje va sobre el total, por tanto si decimas al 10% obtendras el resultado como si no hubieses decimado al 20% y lo hubieses hecho al 10%…por tanto si vuelves a decimar al 20% pensando que lo vuelves a reducir…obtendras el mismo numero de polys.

Al decimar la maya se triangulariza dejando una imagen como la que ponemos arriba. Te habras dado cuenta que esta operacion de Decimado solo tarda unos segundos, ya que Z ya lo tiene todo listo tras la accion Pre-Process All para que puedas jugar con los porcentajes de reduccion.
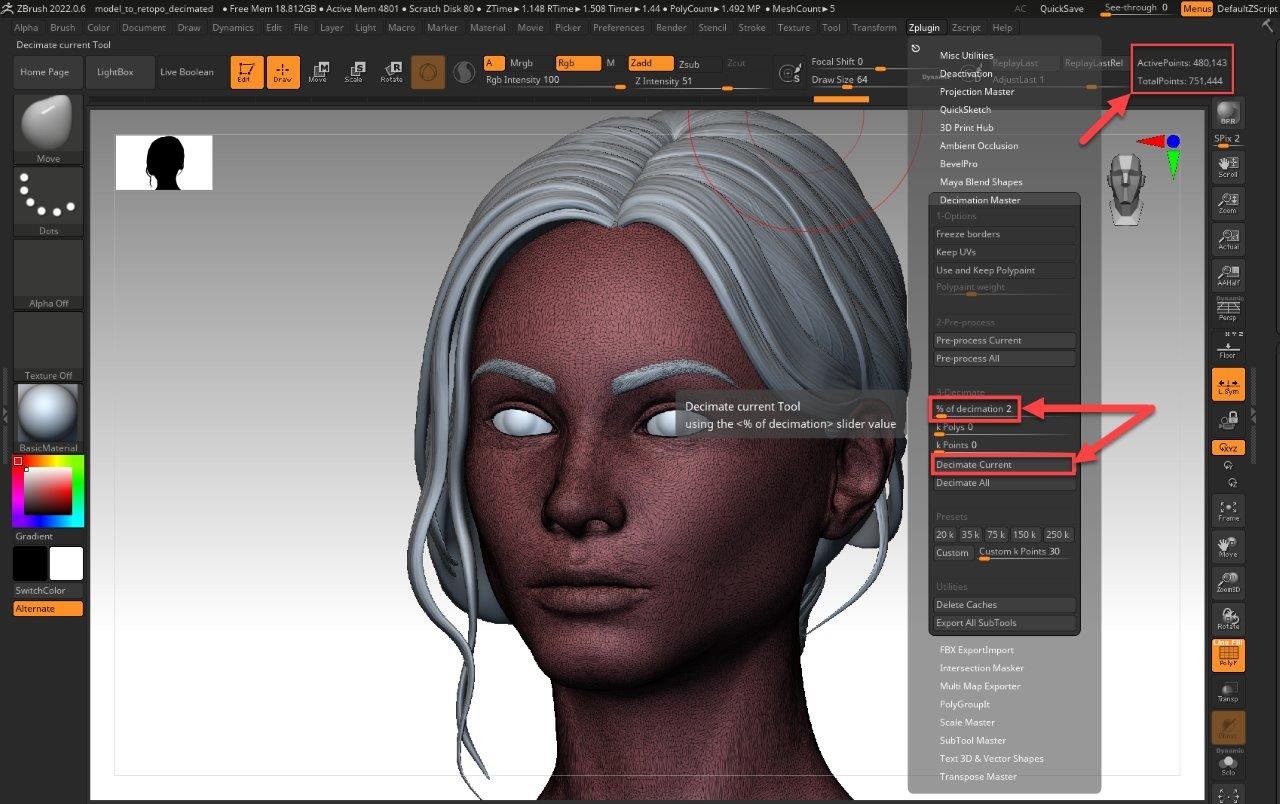
Dado que hemos visto que podemos reducir un poco mas el cuerpo del modelo, le he marcado un 2% de reduccion. Puedes ir probando para ver que porcentaje deja el menor numero de polys sin sacrificar detalle.
Fianlmente el conjunto se ha reducido a 751,442 polys!! (751,444 Puntos Activos).
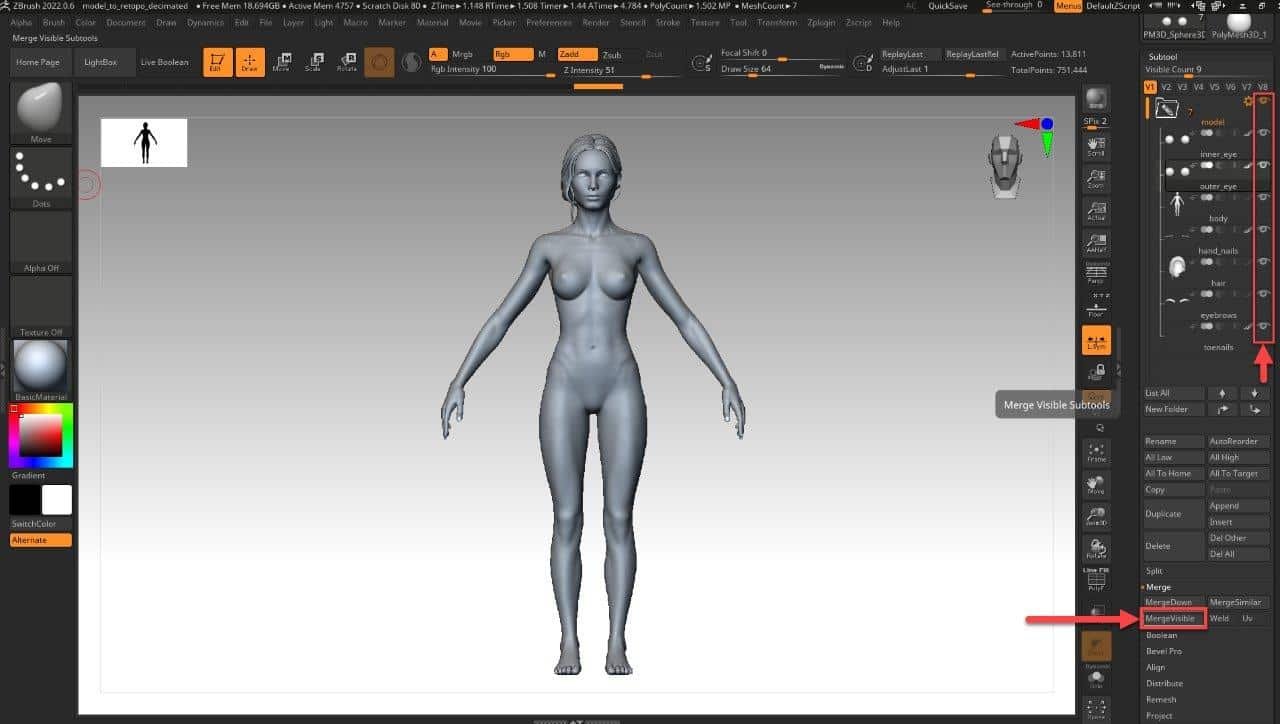
Ya tenemos nuestras tools decimadas, y dado que hemos alcanzado nuestro proposito de tener una referencia ligera, vamos a exportar el modelo completo a Maya y para ello uniremos todas las subtools en una sola con la opcion Merge> MergeVisible, este proceso pegara todas las tools que aparecen en pantalla (el ojo de la tool debera estar activo) en una sola pero respetando la independencia de mayas, por tanto lo podras separar mas adelante si asi lo necesitases.
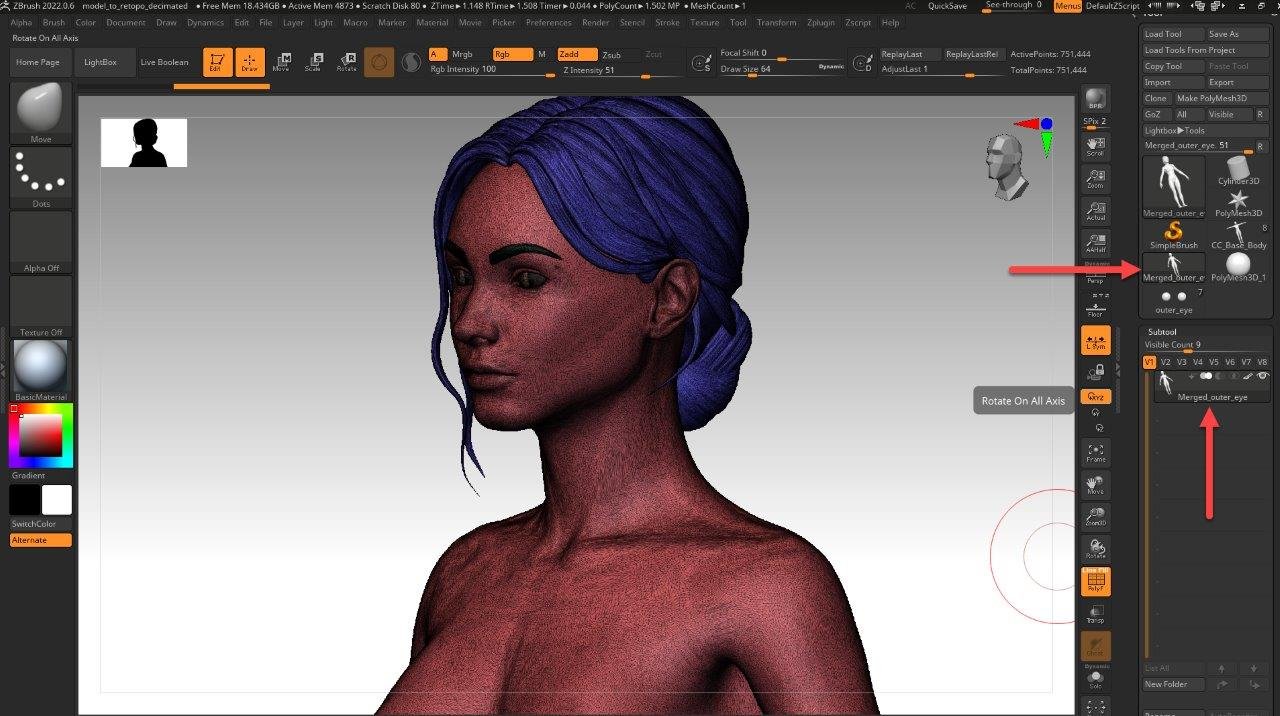
El proceso de MergeVisible nos ha generado una nueva tool con todo el modelo. Seleccionamos esta tool y nos vamos al menu de Exportacion.
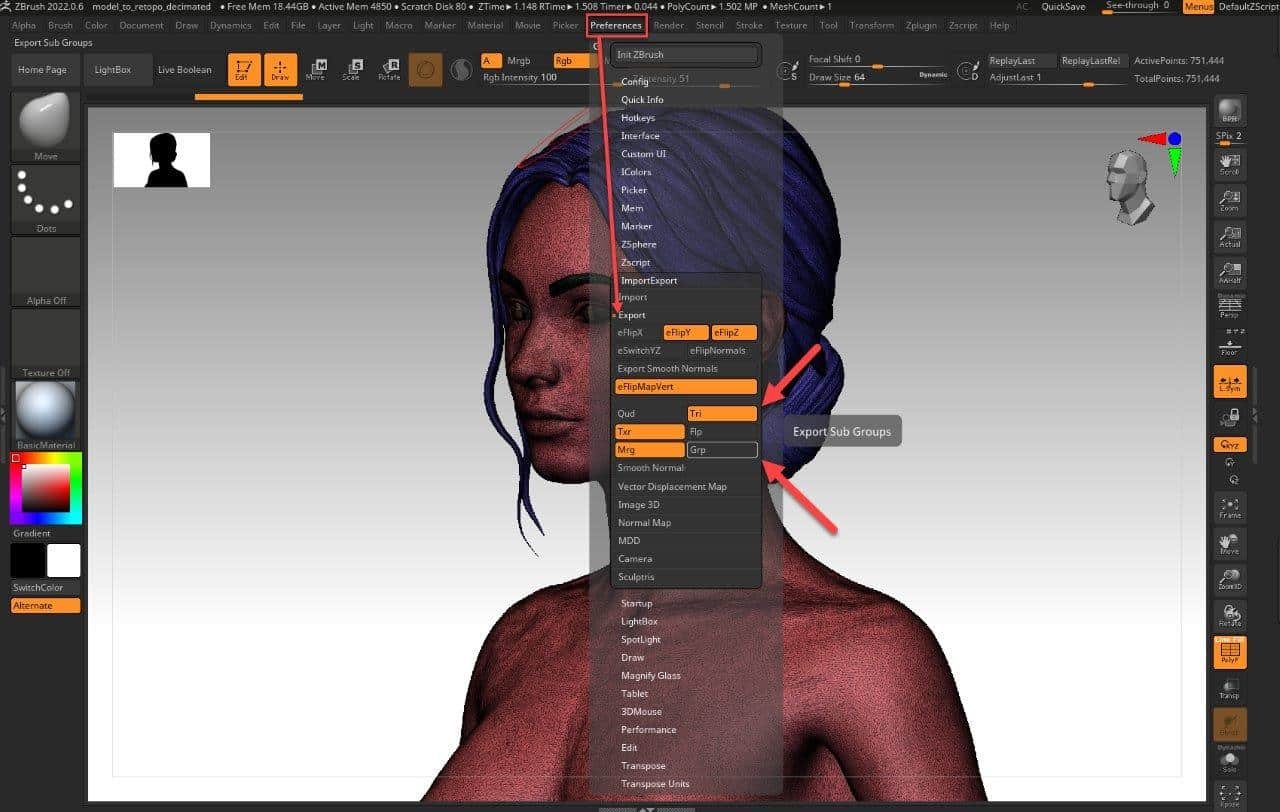
Preferences> Export : marcamos Tri por aquello de tener el modelo triangularizado y desmarcamos “Grp” para que no me aparezca en Maya el modelo fragmentado en pequenos pedacitos…
Hemos configurado la exportacion y nos vamos a exportarlo…
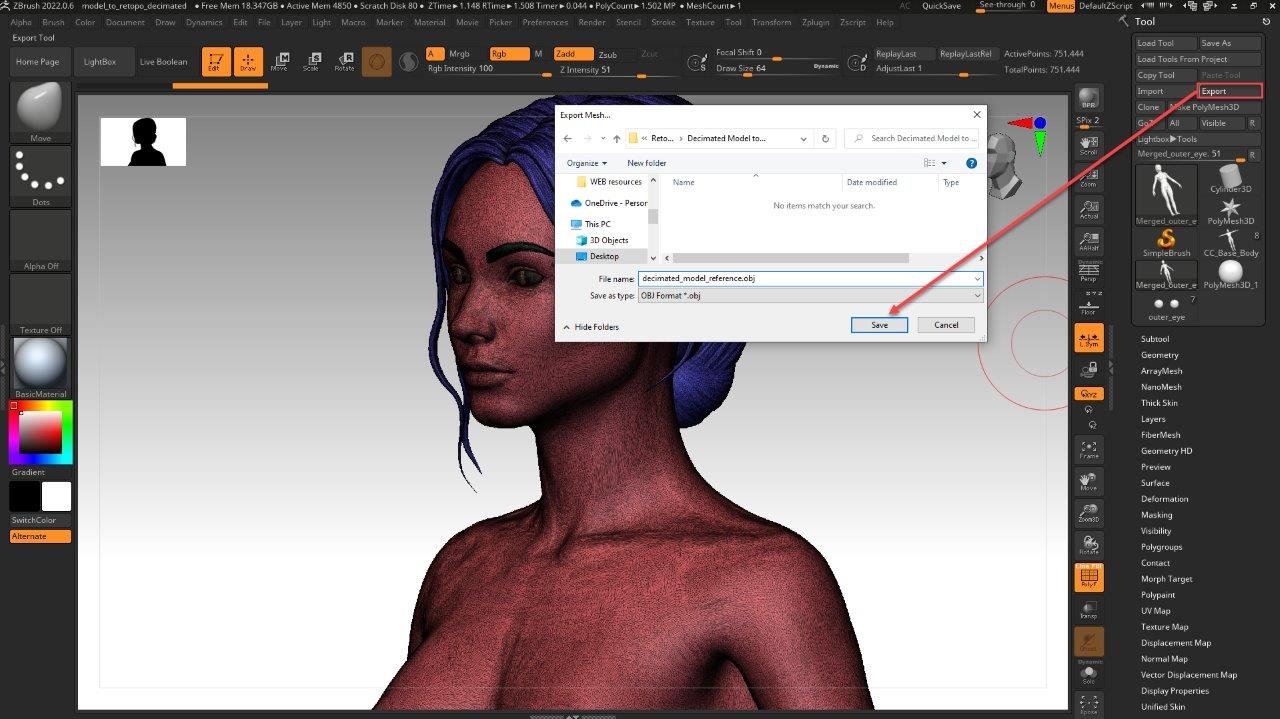
Seleccionamos Export como inidco arriba, le damos un nombre y guardamos el modelo en formato .obj (selecionado por defecto) que es el idoneo para moverlo a Maya u otros programas.
Abrimos Maya y nos creamos un nuevo proyecto.
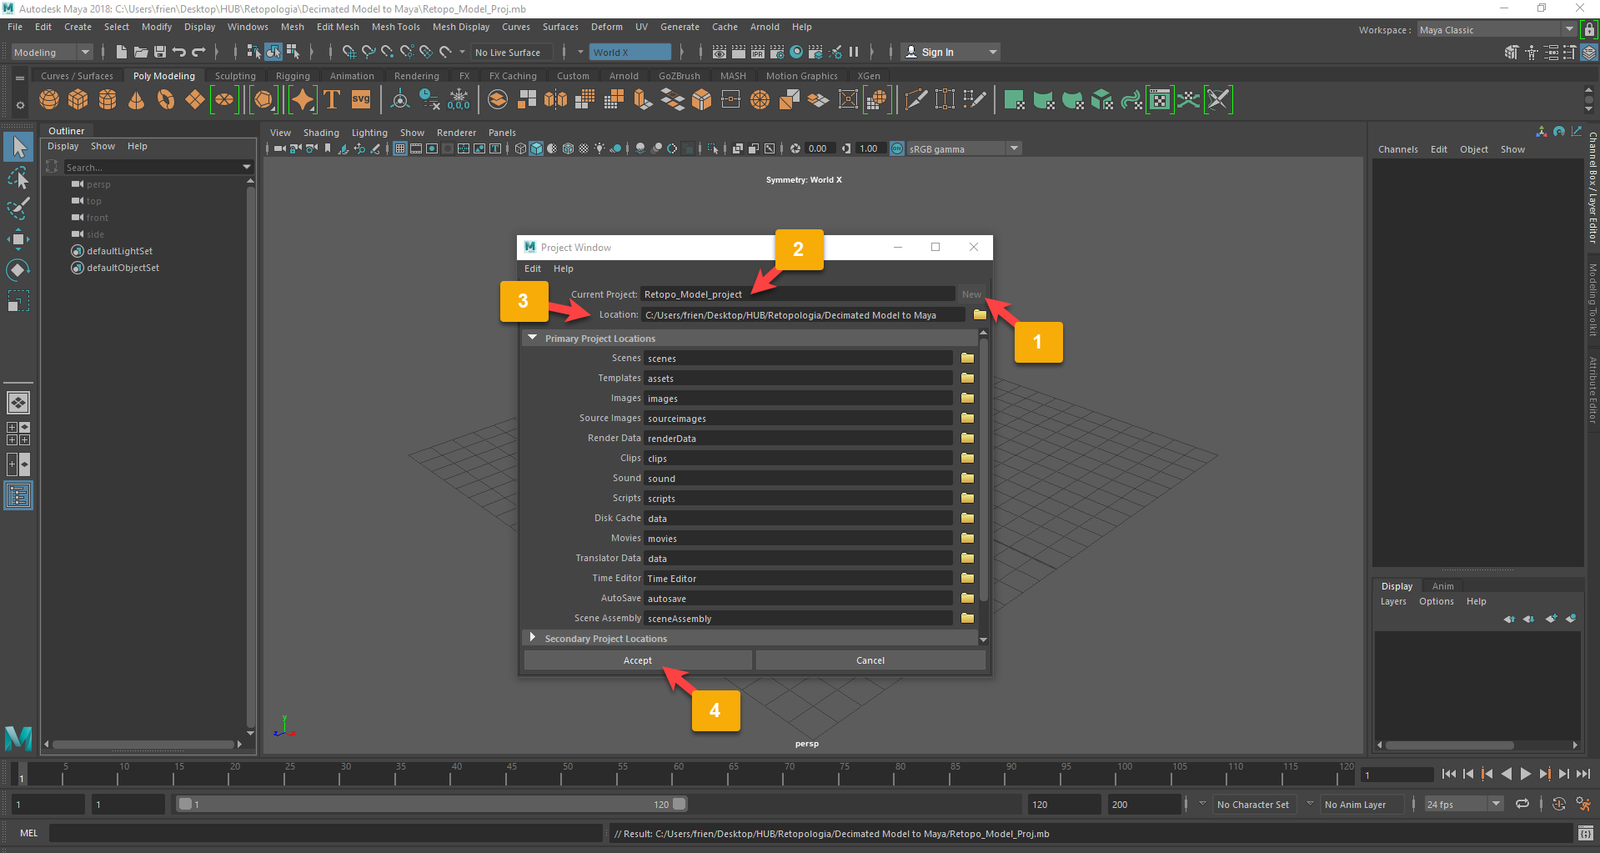
Para crear un nuevo proyecto debemos irnos a File>Project Window y nos aparecera la pantalla que vemos arriba donde presionamos “New” (1) y en “Current Project” definimos el nombre del proyecto (2), de querer, selecionamos la carpeta donde queremos alocar nuestro nuevo proyecto (3). Finalmente Aceptamos (4).
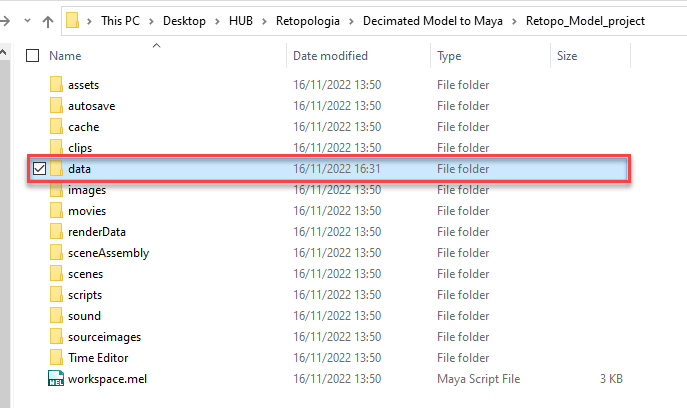
Ya tenemos nuestro proyecto hecho y ahora vamos a abrirlo y vamos a mover nuestro .obj donde sea que lo guardasemos desde Z, al folder de “data” del proyecto de Maya, que como veras tiene muchas subcarpetas.
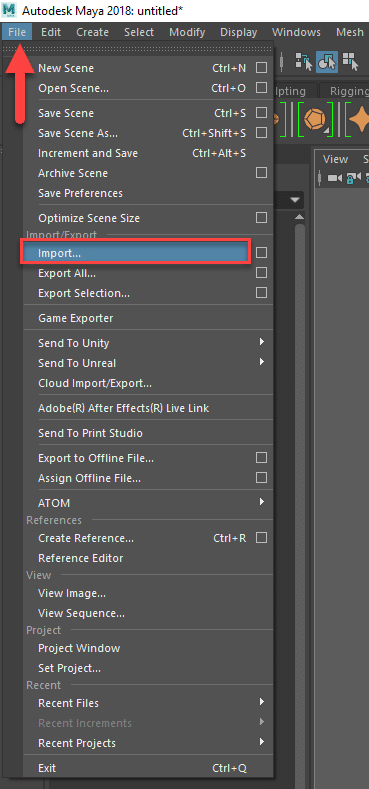
Ahora toca importar el Obj que generamos en Zbrush. File> Import…
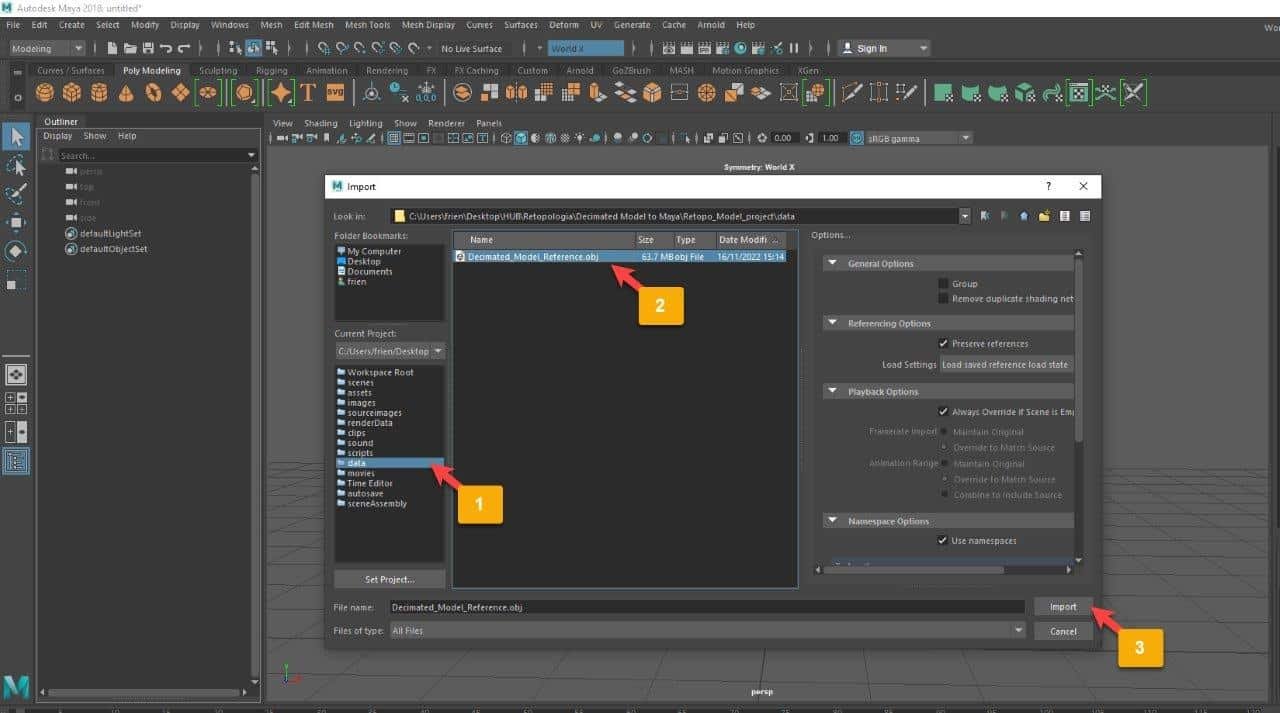
Se abre una pantalla donde en el margen izquierdo nos aparece la disposicion del proyecto, marcamos “data” que es donde lo dejamos (1), seleccionamos el objeto (2), y le damos a importar (3).
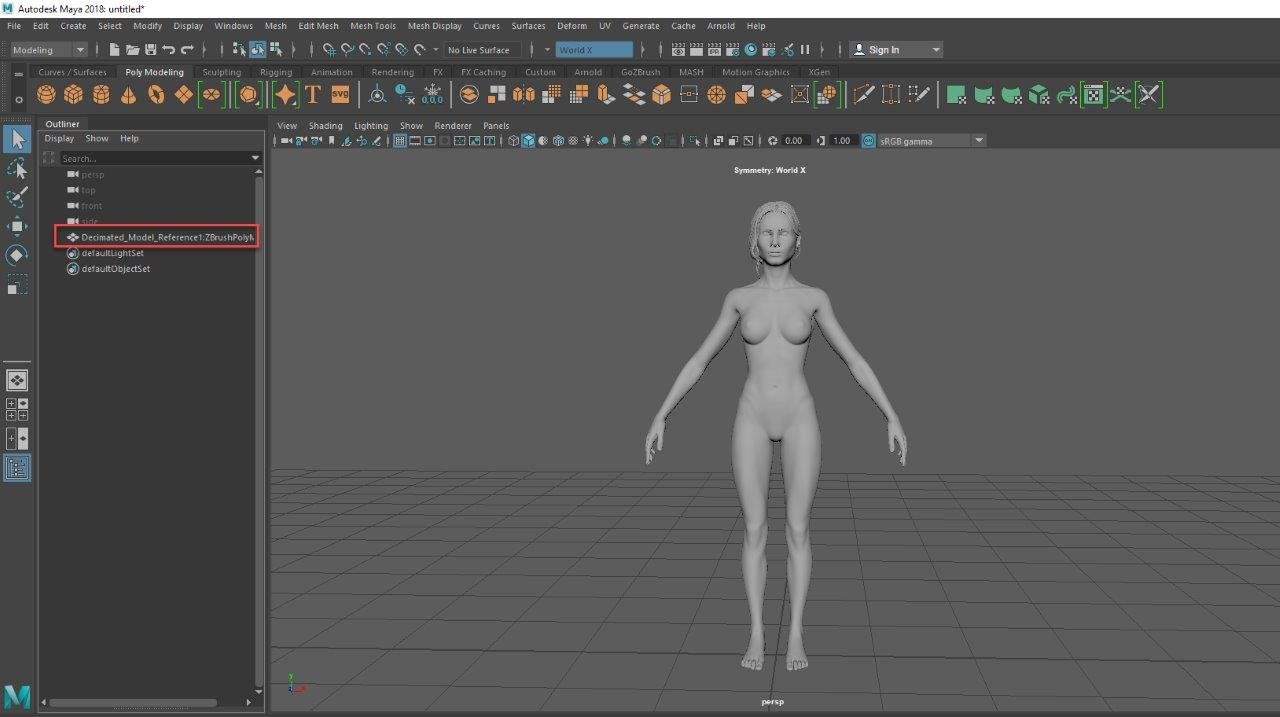
The Outliner is now including our model in one object. I can see that Maya moves very well in this model due to its reduced polycount.
In the next stage, we are going to separate the merged parts (the meshes Maya considered independent parts) to create the new topology independently…
In order to do this we need to select the mesh, and go to Mesh> Separate
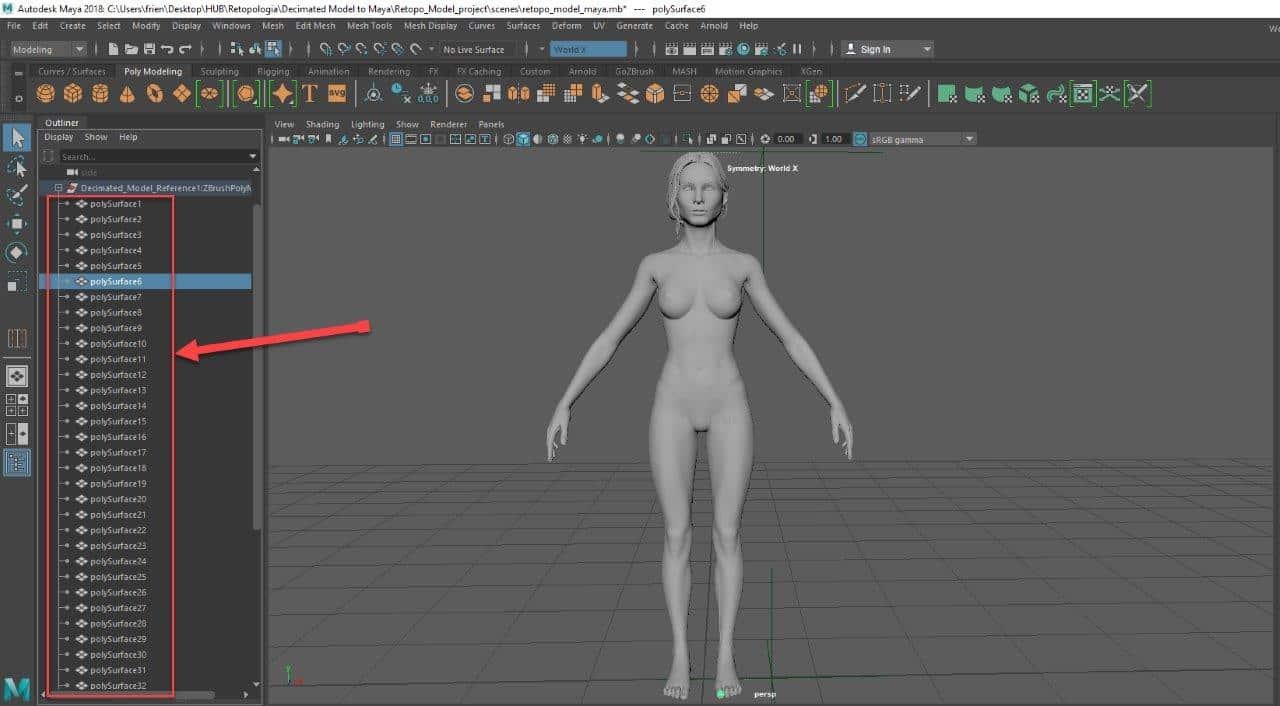
The mesh will be split in several parts that we will reorder later in a different way by grouping them in meshes that can be in the same topology.
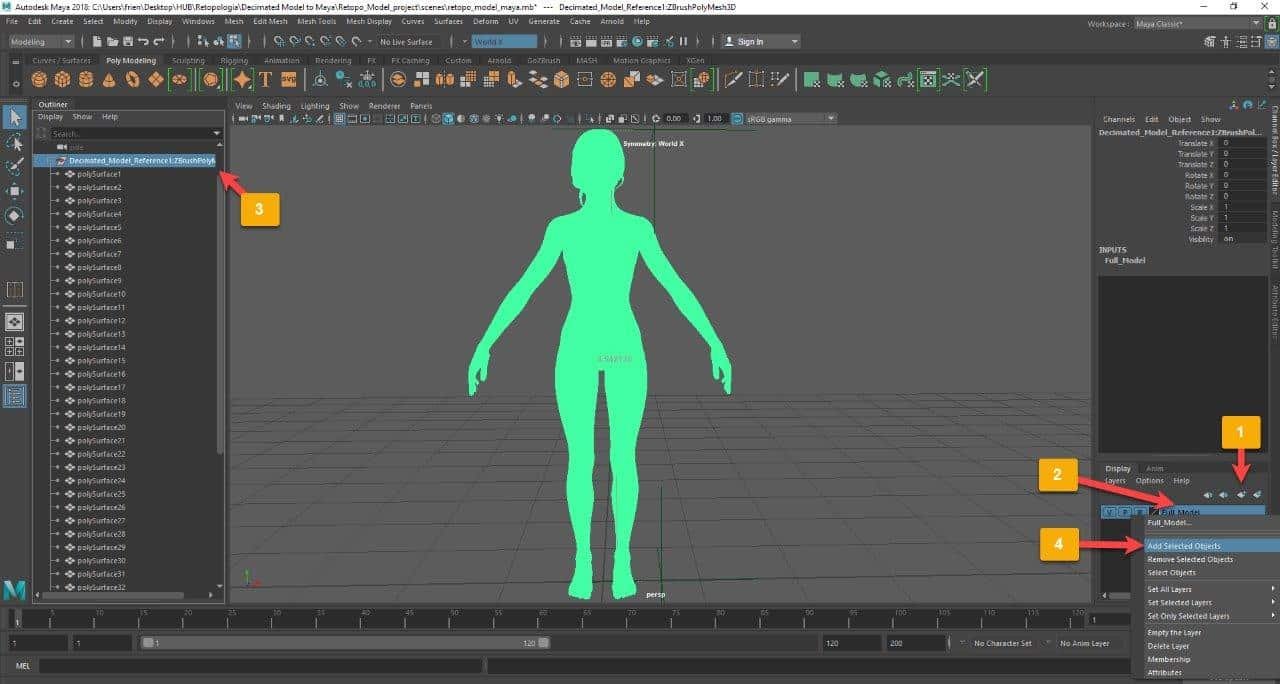
We are going to move all the mesh in a layer to start preparing the environment. In order to do this we create the layer (1), change the name for the one you prefer (2), select the mesh you want this layer will have (3) and Right Mouse Click (RMC from now on) over the layer and “Add Selected Objects”.
The layer will allow us to protect the mesh, make it visible or transparent or just use it as reference.
Now we are going to check the size of the model as we prefer to work with real size. I use cm as unit. You can change it by going to Window>Settings/ Preferences> Preferences> Settings> Working Units > Linear
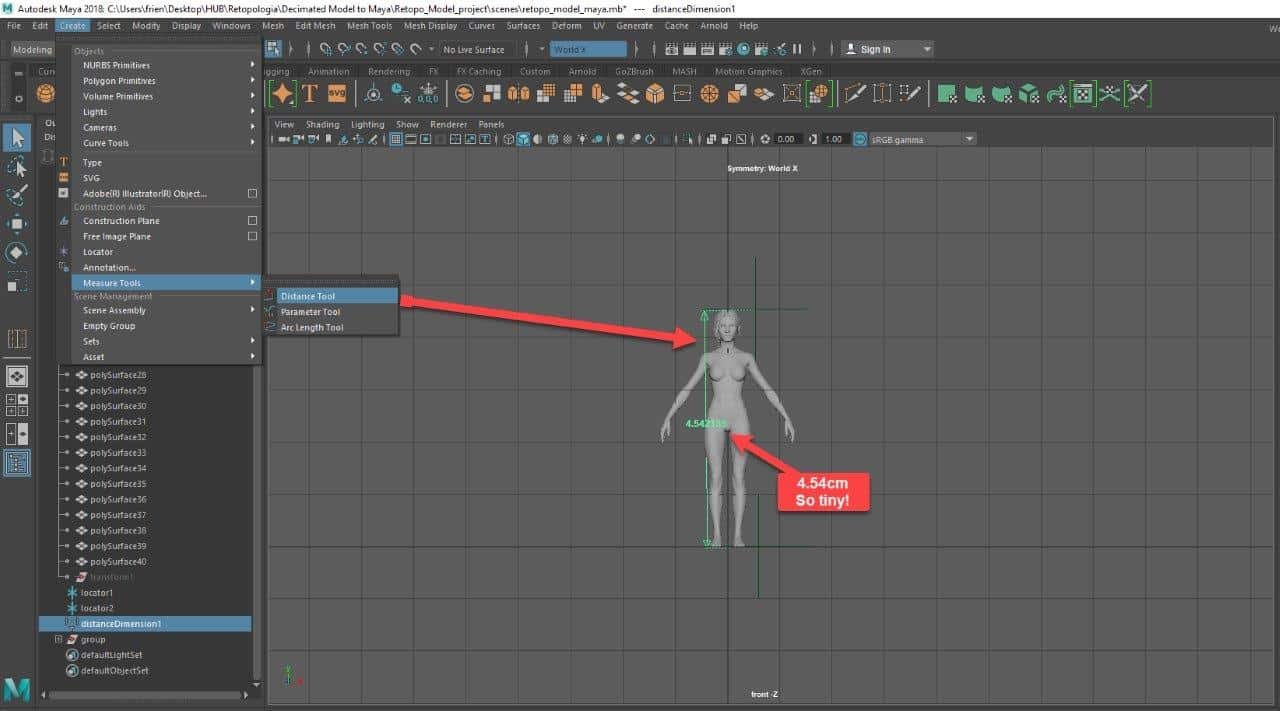
One way to do this is by moving the model into a better view by using the Space key and selecting the “front-Z” view in our case and creating a measure that will tell us how tall our model is.
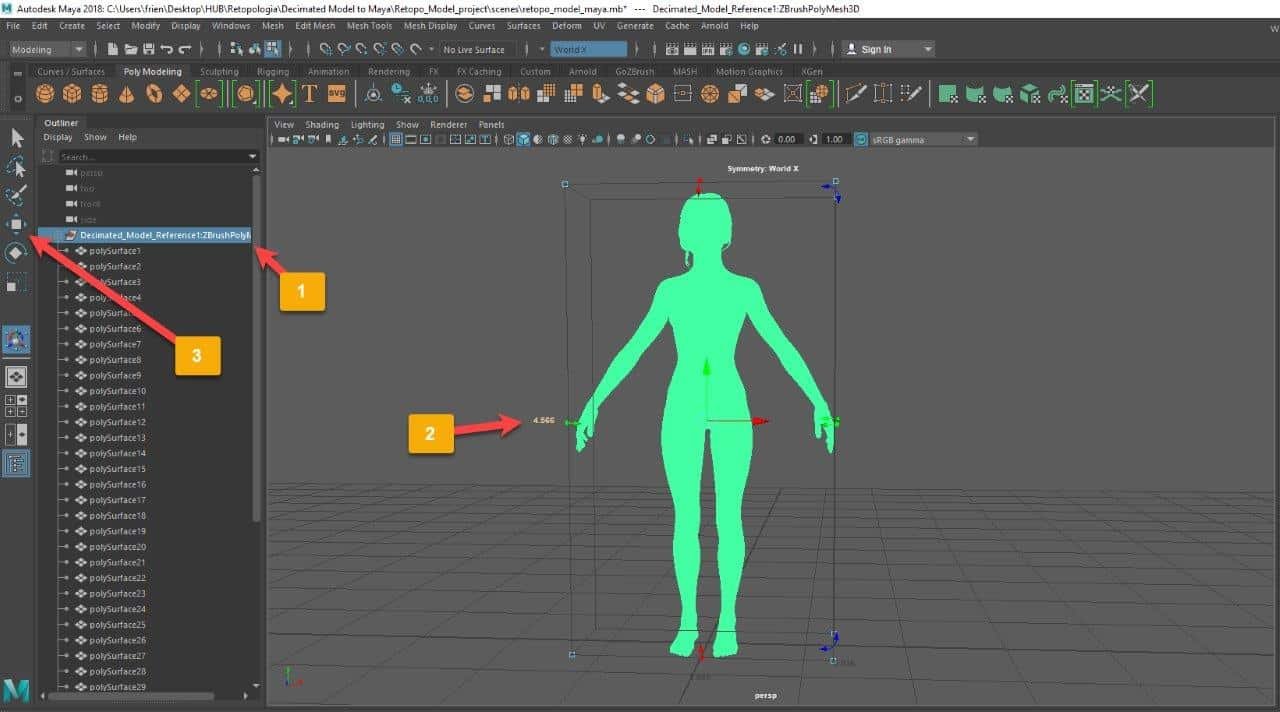
Another method more precise and easier to measure is the Universal Manipulator (Ctrl+T) or Modify> Transformation Tools> Universal Manipulator, that will display a box with the high (2), wide and deep size of your model (previously selected (1)).
If you need to make it disappear, you just need to press for example the Move gizmo (3).
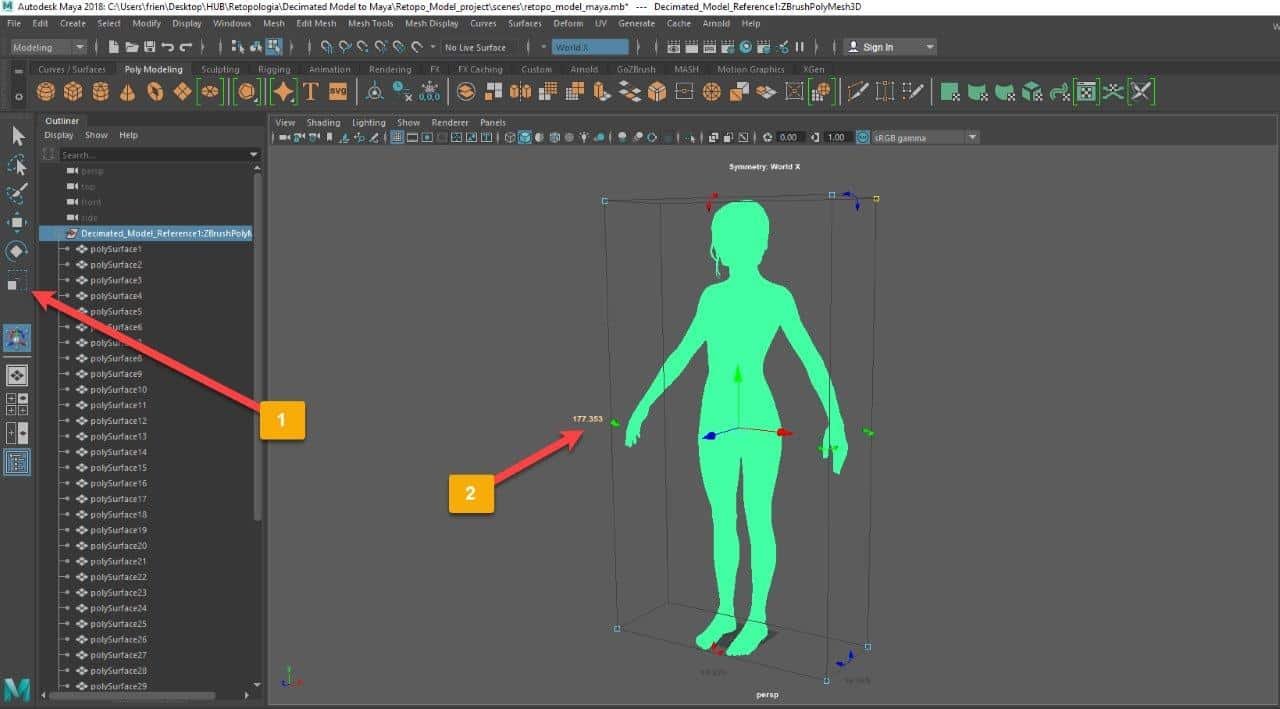
I would like my model to have 177cm approx. therefore I will scale it(1) keeping the same position relative to the ground and verifying with the Universal Manipulator the new size till reaching the desired.
In the next step, we are going to combine the parts that can go in the same topology, for instance, the body and the nails.
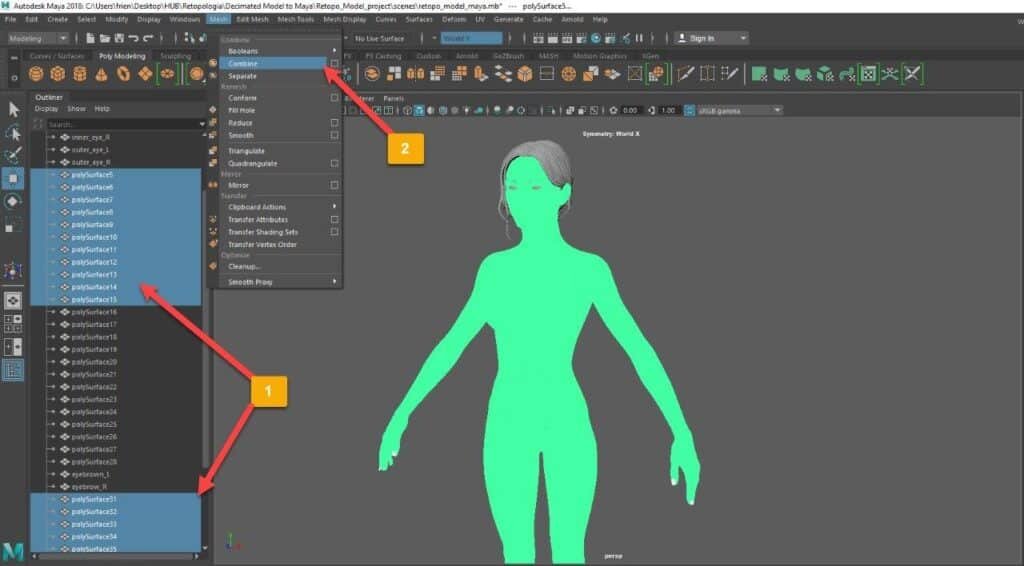
In the next step, we are going to combine the parts that can go in the same topology. In the above photo we decided to combine body and nails. Press Ctrl to select the meshes from the Outliner and once completed then Mesh>Combine and you will get a new mesh at the bottom.
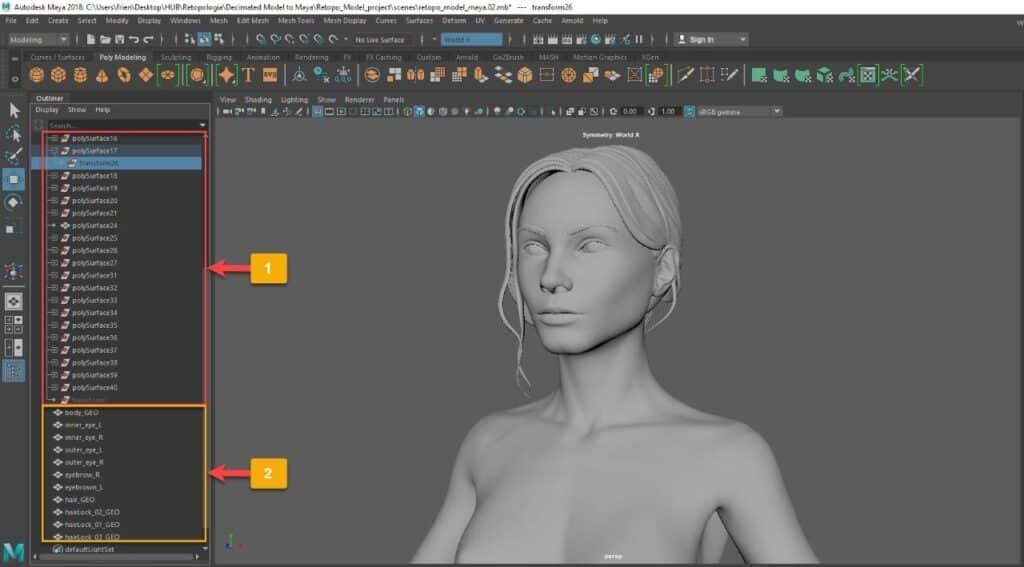
We can see how after combining all the different parts we see them at the bottom of the Outliner (2) and many new items appeared along the “combine” processes (1). These items saved the transformation we did…now we want to remove them to keep the Outliner clean and not to waste memory…therefore we are going to clean the History.


If we want to clean the Historical actions, we need to go to Edit > Delete All by Type > History.
You can see in the above right picture the situation of the Outliner before removing the History and in the right the after picture.
Point 2: Starting with the Retopo.
La intencion de esta tool es la de acabar teniendo un Rig para que podamos usarla como herramienta de modelado o de animacion, y en el transcurso entender el proceso de como un modelo estatico se prepara para poder ser articulado.
Entender las necesidades de un rigger es esencial para poder generar una retopologia que le sea facil de articular y le de el menor numero de problemas.
Recuerda que en una cadena de Produccion el Rigger podra demandar correcciones al que hizo la retopologia si asi lo considera necesario.
Tips para una buena Retopo:
- The meshes need to follow a name convention to make things easier. Not empty groups nor Maya default names.
- Having a good Edge Flow in our Retopo as it is very important for Deformation.
- Having enough density.
- Trying to avoid triangles as much as possible as they are difficult when skinning the model.
- The model should be set in the floor and centered.
- Use spheres in our eyeballs as its better to centre them.
- keeping the model parts in separated meshes.
- Moving the Poles/ Stars/ Spiders to neutral places. For instance, in the face keep them in the cheek but a bit closer to the ears. (Remember that a Pole is a vertex that connects less than or more than four edges). If you place poles in the
wrong places, these can result in a pinch when the mesh is subdivided. - Avoid Poles with more than five edges and do not abuse its use. Use them mindfully.
- It would be nice to use edge loops in eyes, mouth and muscles, as they will provide a more realistic deformations.

In Maya we will use the Quad Draw tool therefore we will need to make the mesh “Live” to apply later this option.
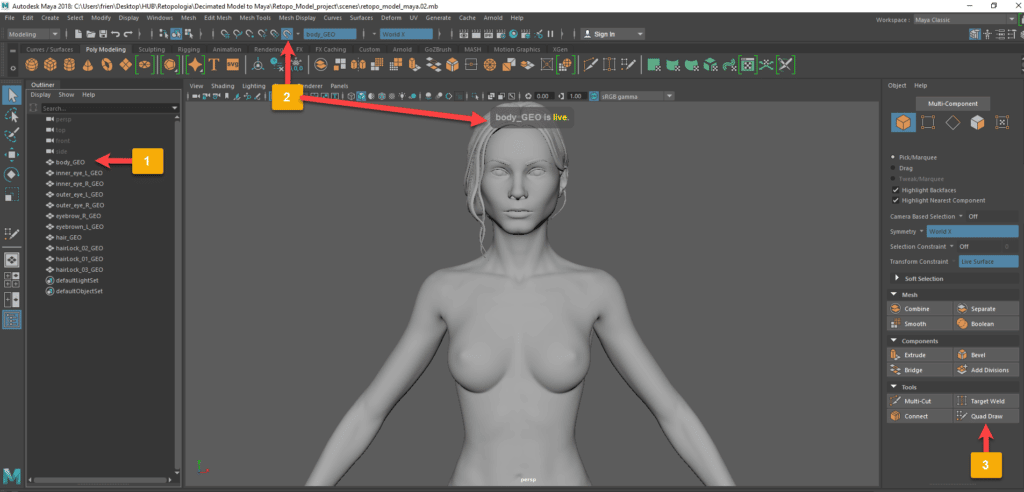
Select the mesh you want to apply the new surface (1), select the Magnet icon (2) or Modify > Make Live and the mesh will be “Live” and ready. Now is time to click on the Quad Draw icon from the “Modelling Tool Kit” (3).
Below you will find the commands we will use along the retopology process and that you can find also posted in the same tool board (Keyboard/ Mouse Shortcuts).
Maya Quad Draw Commands:
Hovering outside the quad mesh:
| MMB: | Click to drop dots |
| LMB: | Drag to tweak dots |
| MMB: | Drag dots along Normals (when no live surface constraint is active) |
| Ctrl+Shift+LMB: | Delete dots |
| Tab+LMB | Drag to draw quads strips |
| Tab+MMB | Drag to resize quad strips |
| Shift+LMB: | Click between dots to create geometry |
Hovering inside the quad mesh:
| LMB: | Drag to tweak components |
| MMB: | Drag components along Normals (when no live surface constraint is active) |
| Ctrl+LMB: | Click edge to insert loop |
| Ctrl+MMB: | Click edge to insert centered loop |
| Shift+LMB | Drag to relax points |
| Shift+MMB | Drag to relax highlighted points |
| Tab+LMB: | Drag to extend borer edge |
| Tab+MMB: | Drag to extend border edge loop |
| Ctrl+Shift+LMB: | Click on drag across faces to delete |
| Ctrl+Shift+LMB: | Click edge to delete edge loop |
| Ctrl+Shift+MMB: | Drag edge to tweak edge loop |
| Ctrl+Shift+RMB: | Quad Drag options |
Thanks for reading.

Miguel Angel Torio
HandyTales Founder & CEO


Ninecassino4 is pretty decent. I like their live casino section, feels just like being there which is cool. Good for a casual night of playing. Give it a shot guys! ninecassino4
P777gamelogin makes getting in super easy, and that’s a huge win for me. Simple access is what matters and you will find it here: p777gamelogin
A555game is a nice little gem! Easy to pick up and play, which is exactly what I was looking for. Good selection of games too. Check it out! a555game
G’day, guys! Been having a bit of a go on goldenhoyeah1. Not bad, I must say. Graphics are alright and the gameplay’s smooth enough. Worth a look-in: goldenhoyeah1
Landed on OKVNDBET and haven’t looked back! Solid platform and smooth gaming experience. Give okvndbet a shot. You might just find your new favorite spot.
Hey guys, just tried out bcx88bet and honestly, not bad! The slots are pretty fun and I even managed to snag a small win. Give it a shot!
Alright, alright, let’s talk vnbet88. The live casino games are pretty slick. Had a good time playing blackjack. Definitely worth a look if you’re into that!
Yo! Finally found a spot where the games ain’t rigged. Gamece88 is legit, been playing for a week and already seeing some sweet wins. Check it out, you might get lucky too! gamece88
BBQ999game… weird name, but the games are actually pretty decent. Had a good session last night playing poker. Not bad, could be worse. Give it a shot if you’re bored! bbq999game
Yo, finally got the link login for JL16. Site seems alright, tons of games. Gonna give it a whirl tonight and see if I can win some dough. Wish me luck! jl16linklogin
Yo, zomclub26 is where it’s at! They always got somethin’ goin’ on, whether it’s a bonus or a new game. Keeps things fresh, ya know? Worth checkin’ out if you get bored easy. Find it here: zomclub26
Alright mates, m88asialink is where it’s at! Got some decent wins, and the site’s pretty easy to navigate. Give it a shot, you might get lucky! Hop over here: m88asialink
Heard good things about babu888gold, and it lives up to the hype. Fun games, easy to use. If you’re looking for a new place to play, check it out: babu888gold
Get the latest updates about your srd status check quickly and easily. Learn how to track your SRD application online, check approval progress, and understand payment dates. Our simple guide helps applicants stay informed with accurate information and step-by-step instructions for hassle-free verification.
JJ77 is a solid platform. I’ve been playing there for a bit and haven’t had any issues. Decent selection of games too. Take a look: jj77
Been trying out jj99game and it’s pretty good. The games are cool and the site runs smoothly. Worth checking out if you’re looking for something new. Here’s the link: jj99game
Just started playing on jljl66 and I’m impressed! The site is easy to navigate and the games are entertaining. Give it a try: jljl66